The account screen lists the patient’s invoices and transactions in reverse in date order. The default view is View By Invoice. Select View By Transaction to view a list of the items and payments recorded against the patient's account.
Each Invoice, Credit Payment or Refund can be viewed in detail by clicking on the header for that line item.
Using the Bulk Action options on the drop down list above the list of Invoices you make a number of changes. First tick the box(es) of the invoice(s) and credit payments you want to work on. Tick the checkbox next to the Bulk Actions list to select all invoices and payments for that patient.
Bulk Action options:
- Print This will produce a PDF file containing the selected items in a Statement format. The file can then be printed or downloaded.
- Archive This "archives" an invoice so it won't show on the Outstanding Balances report. This might be used if you wish to write off bad debts but not remove them completely from the patient's account.
- Unarchive This "unarchives" previously archived invoices.
- Delete This deletes credit payments and invoices from the account. If a credit payment has been allocated, it cannot be deleted until the invoice it has been allocated to is deleted.
Refunds
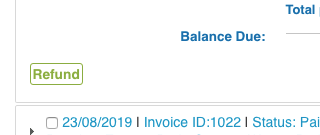
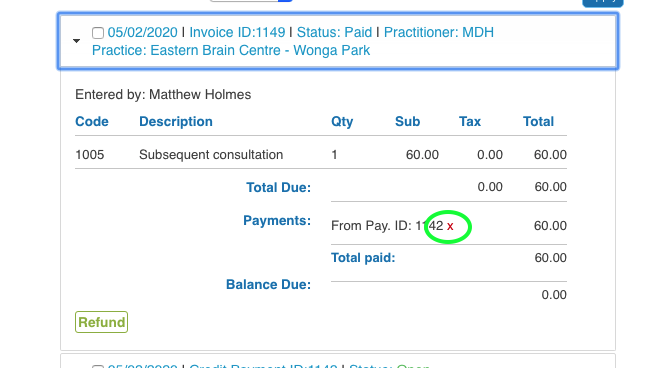
To refund a Transaction or Credit payment, click on the header of that item, then click the green Refund button and follow the prompts.

Note, Credit payments cannot be refunded if they have been allocated to invoices. First remove the allocations by clicking on the red cross under each invoice.

Using the buttons to the right you can also enter a transaction (Enter Items) or a payment (Enter Payment).
Enter Items
The Transaction dialogue box allows you to enter service and stock transactions for that patient.
Otherwise an alert will show asking you to either enter their details or enter the service via the Patient Details screen. This is to avoid transactions being entered that are not linked to a patient, and hence effectively lost in the system.
The first option in the dialogue box is the date which defaults to today. It can be changed if you need to. Next is the account balance, telling you if the patient owes money or is in credit. The payment category which alerts you to whether the patient is in a category that needs special attention such as concession etc. Then there is the Comments box which lists any Comments recorded on the patient's details screen.
There should already be a line item inserted for the appointment type for which the patient is booked. If you wish to delete this or any other line item click the red minus icon at the end of the line.
To add a Service or Stock item click on the relevant drop down list and select the item. You can refine the list by searching.
Once a line item has been added you can edit the the individual totals, quantities and tax rates. Select the correct practitioner from the drop down list.
To record a payment at the same time as the items, click the “Record a payment?” box. Then select the type of payment from the first drop down list. When you do this, the full amount of the service will be entered into the box next to it. If this is only part of the payment (such as with HICAPs part-payments) click on the box, change the amount, then select the next payment type from the next list. On doing this it will automatically update its box with the balance amount. Again, if this needs to be altered, do so. Up to 3 different types of payment can be entered at one time.
If the patient has credit amounts on their account, they can be applied to the totals if their tax rates correspond. Note however that entering payment amounts in the payment boxes outlined above will override the use of any credits. Click “Save” to enter the transaction, otherwise, click the cross if you wish to cancel.
Enter Payments
This option enables you to enter payments. When entering a payment you can either apply payments to existing invoices, or enter credit payments.
To make a payment against an existing invoice, tick the relevant invoice from the list. Then select a payment method then enter an amount in its corresponding box. You can enter up to 3 payments in this dialogue box.
Alternatively if you wish to enter a credit, tick the Account Credit box then select the tax rate. Enter the payment type and amount then Save.
These amounts can then be used when entering transactions.
Other Buttons
If your account was active prior to 12th June 2016 (the date our current invoice based system was introduced), you will see buttons to enable you to manage transactions from prior to that date. They are Payment, Refund and Delete. Only use these to work on older transactions.
You can also print statements and invoices based off transactions (the old way of printing). Most times you should print using the Bulk Action option instead of these buttons.
1. Statements are lists of transactions (both payments and services/stock). Clicking on the “Statement” button will open a new window (if nothing happens check that popups are not being blocked). From here you can select the transactions you can add to the statement or choose a date range to include and then produce a pdf document for saving or printing. Either print or save the pdf statement that is produced. Tick the "Email the statement as well?" box to email the statement to the patient (only visible when the patient has a valid email address in the system).
2. Invoices are lists of services or stock transactions. They do not list any payments. Select which transactions to include in the popup window or choose a date range to include. If the patient has a third party payer linked to their account you can check the “Invoice to Third Party Payer?” box and the invoice will be addressed accordingly with any listed reference numbers.
If you have a header image uploaded you can choose whether to include this on the invoice or statement.
Master and Secondary Accounts
To manage Master and Secondary accounts (aka Family Billing) read this article here.
Third Party Payers
To add a third party payer to the patient’s account, select the payer from the drop down list at the bottom of the screen (the payers are defined in the admin section). Then enter any reference number in the “Third Party Ref. No:” field to the right. Be sure to click update to save any changes.
To delete a transaction, click on the “Delete” button and follow the prompts in the popup window. For audit purposes all transactions are retained in the database, but are not shown on the record.
